There are a lot of tools you can use for you workflow, but I have found that the following programs are the best to use:
- Lightroom - For organizing and performing essential editing of your photographs.
- Photomatix - Arguably the best HDR merging software available. It also has plug-ins for Lightroom which makes this the first choice for your workflow
- Photoshop - Who has used a different software other than photoshop? (I bet no one.)
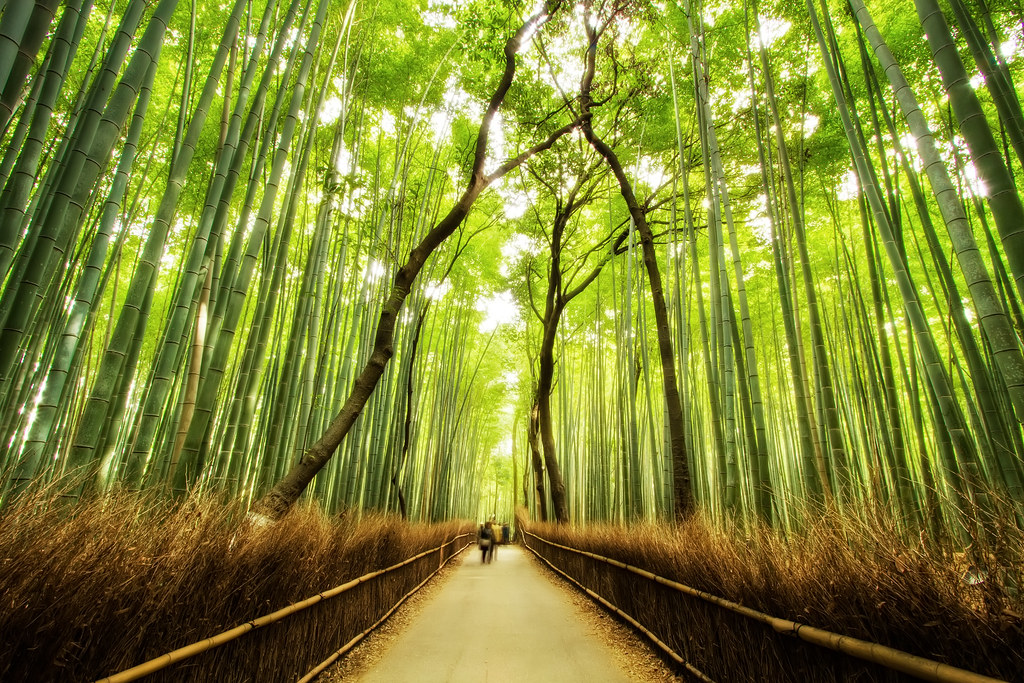
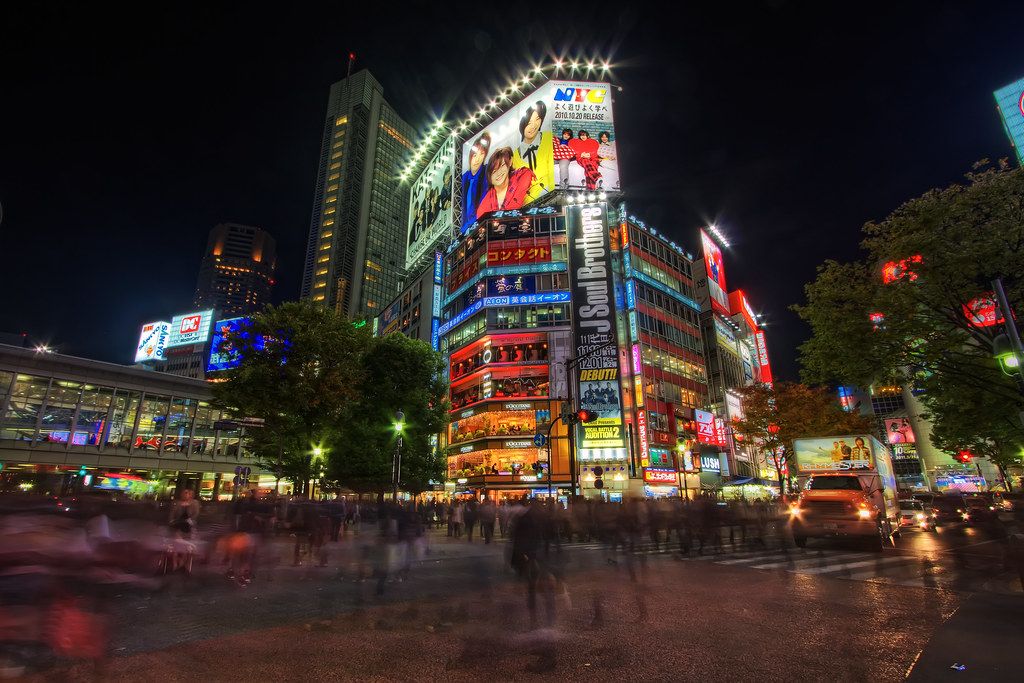
First, as many HDR tutorials I have seen, I'd like to show you where we are going with this workflow. Below is my final image posted in Flickr
Below is my idiot proof workflow when I processing my HDR image.
1. Select your bracketed photos.
I always group them into stacks to avoid clutter which makes them easier to manage.

2. Export bracketed photos to Photomatix.
2. Export bracketed photos to Photomatix.
Just right click on one photo and go to Export->Photomatix Pro.

4. Start from default settings in Photomatix.
Note: It is important that the Lightroom plug-in is checked when installing the Photomatix software.

3. Set the settings before the HDR merging process.
3. Set the settings before the HDR merging process.
- "Align images by matching features" always seem to provide a good output so I always leave them on even if I used a tripod while shooting.
- I leave the "Crop aligned result" unchecked because I want to do the cropping myself.
- For the ghost, noise and chromatic aberrations, I do it inside photoshop so I leave it unchecked as well.
- Finally, I wish to import my HDR image back to Lightroom together with it's source images. Isn't that extremely useful? Hit the "Export" button and you're one your way to Photomatix
4. Start from default settings in Photomatix.
Whenever you load a new image, set it to default because each image is different and it might require a different setting. If you believe me on that, then set it to default by selecting it in the Presets at the lower left.

5. Set your desired Photomatix adjustments.
5. Set your desired Photomatix adjustments.
Some people spend an awful lot of time in this process thinking they would be able to create the final image. In some images it may be possible, but 70% of the time Photomatix cannot generate your perfect image in mind. What Photomatix can do is most of the dynamic range of the photo, so I process the contrast, saturation, exposure adjustments either in Lightroom and/or Photoshop. Given that, the only sliders I change are the following

6. Move HDR image to the top of the stack.
- Strength - I set this to 100% and leave it there no matter what image I'm processing since I can always mix the original picture to reduce the HDRness of the photos. It looks better when masking the original photo rather than reducing the slider.
- Microcontrast - This is to add a little punch to the picture. But I don't change much since my editing software will do a much better job.
- Smoothing - This is the slider I play with the most. Move it from 0 - 10 until you find a setting that suits your taste but for the love of God, don't set it to the negative values!
6. Move HDR image to the top of the stack.
This is not really an important step to make you image look better but I find it useful when I am reviewing my library. I would instantly know if the stack I created already has an HDR image especially when it is collapsed.

7. Load the image to the Develop module.
7. Load the image to the Develop module.
So finally, here we are at Lightroom to adjust all the things we need to adjust to make this image standout. I usually follow the 7 point system when editing (technically, it's 6 since you cannot modify the camera profiles).
Others would be satisfied with this image and would already export the image as a JPEG and upload it to their favorite photo sharing site. But if you're like me and would still like to do more retouching, we go to Photoshop to do this.
8. Load the image to Photoshop for further processing.
- Camera Profile
- White Balance
- Exposure
- Contrast
- Clarity/Vibrance
- Fill Light
- Local Adjustments
 |
| Before the adjustments |
 |
| After the adjustments |
8. Load the image to Photoshop for further processing.
If Lightroom is the go-to guy for adding that je ne sais quoi or "that certain something" to your image, then Photoshop is the king when doing touch ups and repair to your photo.
I usually mix the original photo the the HDR image. I open the files as layers in Photoshop.

9. Align the images.
I usually mix the original photo the the HDR image. I open the files as layers in Photoshop.
9. Align the images.
Just to make sure that the images are perfectly aligned, it won't hurt to perform this process. Sometimes the output of the photomatix changes the size of the HDR image. This step ensures the image sharpness when you are mixing the original photo.

10.Layer in the original photo.
10.Layer in the original photo.
Some people create a layer mask and start painting to mix the two pictures together. When I'm lazy, I usually just set the opacity from 50-70% depending of the picture.

And that's it. I'll save it and export it as a JPEG.
And that's it. I'll save it and export it as a JPEG.
I originally planned this to be a screen cast but my laptop is just super slow. So please comment if you have any suggestions for improving my workflow. Comments are always appreciated =)
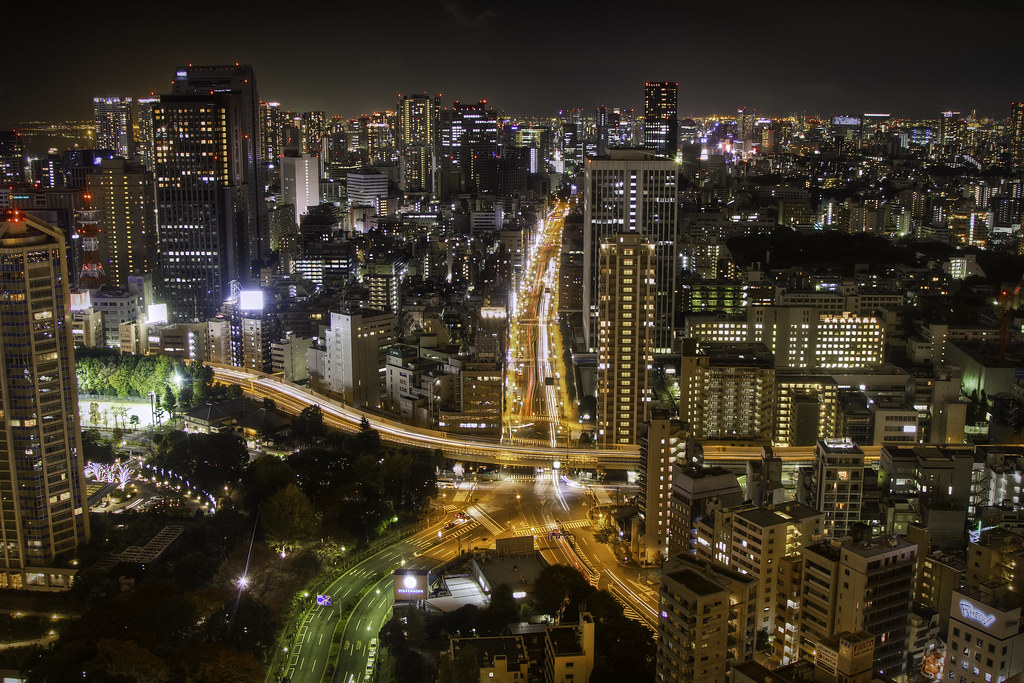
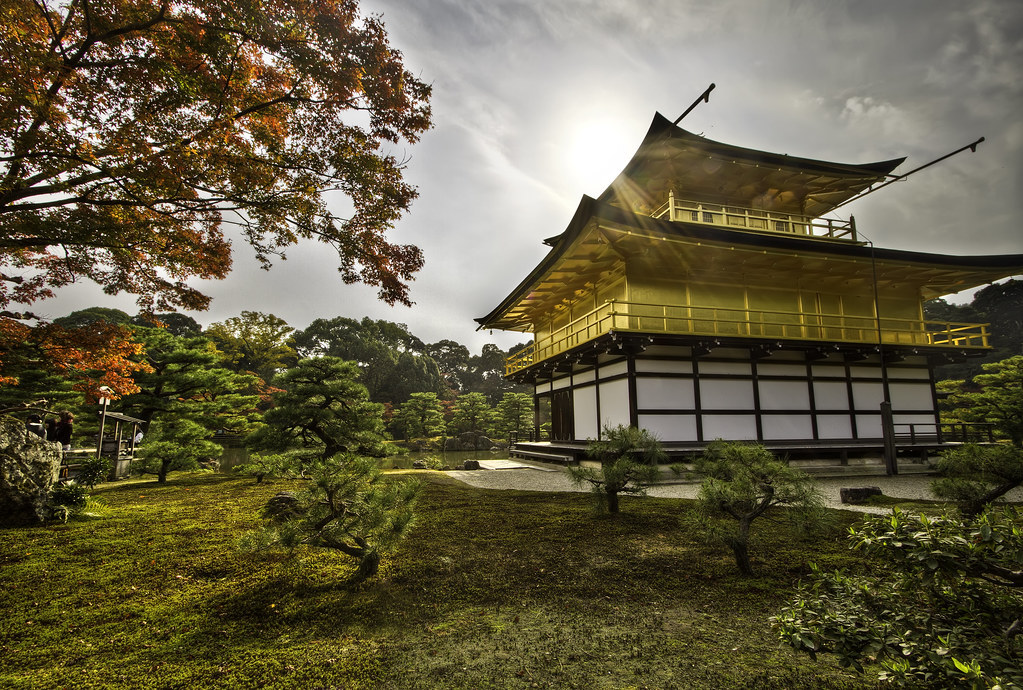
Below are my other photos that used the same workflow.
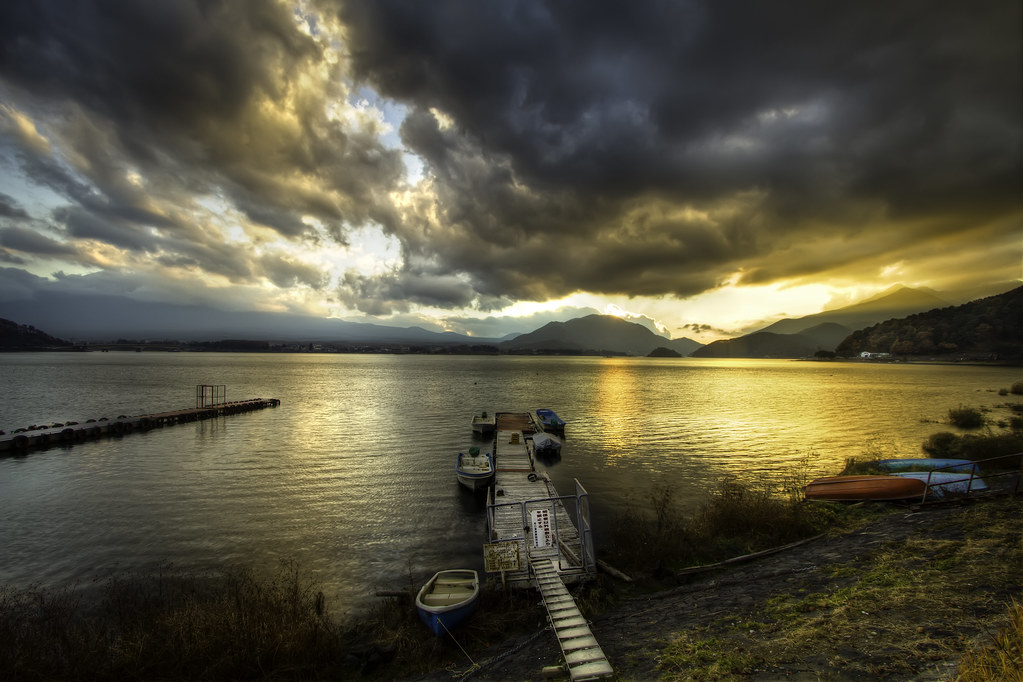
Below are my other photos that used the same workflow.
awesome! thank you for sharing your HDR workflow, and I find it interesting especially in merging the HDR photo with the original photo. I tried it before usually when I need to make the ghosting disappear, but you show different usage of blending the original image to keep the natural look of HDR. Very nice!
ReplyDeleteGreat and VERY clear and useful! Thanks for sharing your workflow - some really helpful thoughts and I'll be trying your approach!
ReplyDeleteFab photo. very fascinating skills. Thanks for sharing to us. were expecting for more!
ReplyDeleteThanks a bunch. Well writen and to the the point. Great photography!
ReplyDelete